Создание и проверка форм. PHP сценарии обработки HTML форм Исполнительный register form php
What is Form?When you login into a website or into your mail box, you are interacting with a form.
Forms are used to get input from the user and submit it to the web server for processing.
The diagram below illustrates the form handling process.
A form is an HTML tag that contains graphical user interface items such as input box, check boxes radio buttons etc.
The form is defined using the ... tags and GUI items are defined using form elements such as input.
In this tutorial, you will learn-
When and why we are using forms?- Forms come in handy when developing flexible and dynamic applications that accept user input.
- Forms can be used to edit already existing data from the database
We will use HTML tags to create a form. Below is the minimal list of things you need to create a form.
- Opening and closing form tags …
- Form submission type POST or GET
- Submission URL that will process the submitted data
- Input fields such as input boxes, text areas, buttons,checkboxes etc.
The code below creates a simple registration form
Registration Form
Registration Form
First name:
Last name:
Viewing the above code in a web browser displays the following form.

- … are the opening and closing form tags
- action="registration_form.php" method="POST"> specifies the destination URL and the submission type.
- First/Last name: are labels for the input boxes
- are input box tags
is the new line tag- is a hidden value that is used to check whether the form has been submitted or not
- is the button that when clicked submits the form to the server for processing
The action attribute of the form specifies the submission URL that processes the data. The method attribute specifies the submission type.
PHP POST method- This is the built in PHP super global array variable that is used to get values submitted via HTTP POST method.
- This method is ideal when you do not want to display the form post values in the URL.
- A good example of using post method is when submitting login details to the server.
It has the following syntax.
- “$_POST[…]” is the PHP array
- This is the built in PHP super global array variable that is used to get values submitted via HTTP GET method.
- The array variable can be accessed from any script in the program; it has a global scope.
- This method displays the form values in the URL.
- It’s ideal for search engine forms as it allows the users to book mark the results.
It has the following syntax.
- “$_GET[…]” is the PHP array
- “"variable_name"” is the URL variable name.
| Values not visible in the URL | Values visible in the URL |
| Has not limitation of the length of the values since they are submitted via the body of HTTP | Has limitation on the length of the values usually 255 characters. This is because the values are displayed in the URL. Note the upper limit of the characters is dependent on the browser. |
| Has lower performance compared to Php_GET method due to time spent encapsulation the Php_POST values in the HTTP body | Has high performance compared to POST method dues to the simple nature of appending the values in the URL. |
| Supports many different data types such as string, numeric, binary etc. | Supports only string data types because the values are displayed in the URL |
| Results cannot be book marked | Results can be book marked due to the visibility of the values in the URL |
The below diagram shows the difference between get and post


The registration form submits data to itself as specified in the action attribute of the form.
When a form has been submitted, the values are populated in the $_POST super global array.
We will use the PHP isset function to check if the form values have been filled in the $_POST array and process the data.
We will modify the registration form to include the PHP code that processes the data. Below is the modified code
Registration Form //this code is executed when the form is submitted Thank You
You have been registered as
Go back to the form
Registration Form First name:Last name: checks if the form_submitted hidden field has been filled in the $_POST array and display a thank you and first name message.
If the form_fobmitted field hasn’t been filled in the $_POST array, the form is displayed.
More examples Simple search engineWe will design a simple search engine that uses the PHP_GET method as the form submission type.
For simplicity’s sake, we will use a PHP If statement to determine the output.
We will use the same HTML code for the registration form above and make minimal modifications to it.
Simple Search Engine Search Results For
The GET method displays its values in the URL
Sorry, no matches found for your search term
Go back to the form
Simple Search Engine - Type in GET Search Term:View the above page in a web browser
The following form will be shown

Type GET in upper case letter then click on submit button.
The following will be shown

The diagram below shows the URL for the above results
Note the URL has displayed the value of search_term and form_submitted. Try to enter anything different from GET then click on submit button and see what results you will get.
Working with check boxes, radio buttonsIf the user does not select a check box or radio button, no value is submitted, if the user selects a check box or radio button, the value one (1) or true is submitted.
We will modify the registration form code and include a check button that allows the user to agree to the terms of service.
Registration Form
You have not accepted our terms of service
Thank YouYou have been registered as
Go back to the form
Registration Form First name:Last name:
Agree to Terms of Service:
View the above form in a browser
Reg.ru: домены и хостинг
Крупнейший регистратор и хостинг-провайдер в России.
Более 2 миллионов доменных имен на обслуживании.
Продвижение, почта для домена, решения для бизнеса.
Более 700 тыс. клиентов по всему миру уже сделали свой выбор.
*Наведите курсор мыши для приостановки прокрутки.
Назад Вперед
Создание простой системы регистрации пользователей на PHP и MySQLСоздание системы регистрации - это большая работа. Вам приходится писать код, который осуществляет валидацию email-адресов, отправляет сообщение на почту с подтверждением регистрации, а также осуществляет валидацию остальных полей формы, и много ещё всего.
И даже после того как вы всё это напишите, пользователи будут регистрироваться неохотно, т.к. это требует определённых усилий с их стороны.
В этом уроке, мы создадим очень простую систему регистрации, которая не требует и не хранит паролей вообще! Результат будет легко изменить и добавить к уже существующему PHP-сайту. Хотите выяснить, как это работает? Читайте ниже.
Вот как наша супер простая система будет работать:
Мы скомбинируем форму авторизации и регистрацию. В этой форме будет поле для ввода email-адреса и кнопка регистрации;
- При заполнении поля email-адресом, по нажатию на кнопку регистрации будет создана запись о новом пользователе, но только в том случае, если введённого email-адреса не было найдено в базе данных.
После этого создаётся некий случайный уникальный набор символов (токен), который отправляется на указанную пользователем почту в виде ссылки, которая будет актуальна в течение 10 минут;
- По ссылке пользователь переходит на наш сайт. Система определяет наличие токена и авторизует пользователя;
Преимущества такого подхода:
Не нужно хранить пароли и осуществлять валидацию полей;
- Нет необходимости в восстановлении пароля, секретных вопросов и т.д.;
- С момента как пользователь зарегистрировался/авторизовался вы можете всегда быть уверены, что этот пользователь будет в вашей зоне доступа (что email-адрес является истинным);
- Невероятно простой процесс регистрации;
Недостатки:
Безопасность аккаунта пользователя. Если кто-то имеет доступ к почте пользователя, он может авторизоваться.
- Email не защищён и может быть перехвачен. Имейте в виду, что этот вопрос актуален и в случае, когда пароль был забыт и его необходимо восстановить, или в любой системе авторизации, которая не использует HTTPS для передачи данных (логин/пароль);
- Пока вы настроите как нужно почтовый сервер, существует шанс, что сообщения со ссылками на авторизацию будут попадать в спам;
Сравнивая преимущества и недостатки нашей системы, можно сказать, что система имеет высокое юзабилити (максимально удобна для конечного пользователя) и, в то же время, имеет невысокий показатель безопасности.
Так что использовать её предлагается для регистраций на форумах и сервисах, которые не работают с важной информацией.
Как пользоваться этой системой
В случае, когда вам нужно просто использовать систему для авторизации пользователей на вашем сайте, и вам не хочется разбирать данный урок по косточкам, вот что вам нужно сделать:
Вам нужно скачать исходники, приложенные к уроку
- В архиве найти файл tables.sql
Импортируйте его в вашу базу данных используя опцию импорта в phpMyAdmin. Альтернативный способ: открыть этот файл через текстовый редактор, скопировать SQL запрос и выполнить его;
- Открыть includes/main.php
и заполнить настройки связи с вашей базой данных (указать пользователя и пароль для связи с базой а также хост и имя базы). В этом же файле, вы также должны указать email, который будет использован в качестве оригинального адреса для сообщений отправляемых системой. Некоторые хосты блокируют исходящие мейлы пока в форме не будет указан настоящий email адрес, который был создан из панели управления хостом, так что укажите реальный адрес;
- Загрузите все файлы index.php
, protected.php
и папки assets и includes через FTP на ваш хост;
- Добавьте код ниже на каждую PHP-страницу, где нужно отобразить форму авторизации;
Require_once "includes/main.php";
$user = new User();
if(!$user->loggedIn()){
redirect("index.php");
}
- Готово!
Для тех же, кому интересно, как это всё работает - вперёд к чтению ниже!
Первый шаг - написание HTM- кода формы авторизации. Данный код располагается в файле index.php . Этот файл также содержит PHP-код, обрабатывающий данные формы и другие полезные функции системы авторизации. Узнать об этом больше можно в разделе ниже, посвящённом обзору PHP кода.
index.php
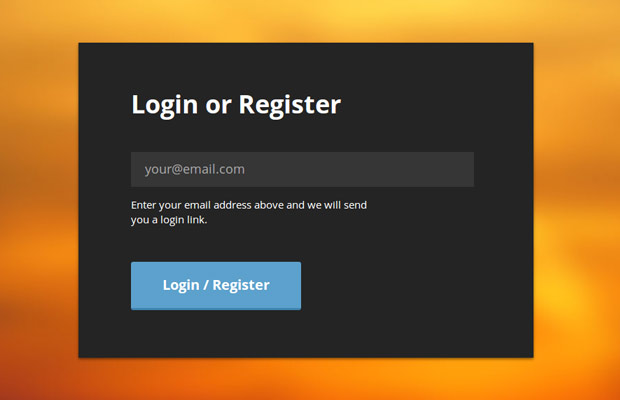
Tutorial: Super Simple Registration System With PHP & MySQL Login or Register
Enter your email address above and we will send
you a login link.
В головной секции (между тегами и ) я подключил основные стили (в этом уроке они не разбираются, поэтому вы можете посмотреть их сами. Папка assets/css/style.css). До закрывающего тега я подключил библиотеку jQuery и файл script.js, который мы напишем и разберём чуть ниже.
JavaScript
jQuery отслеживает состояние кнопки "Зарегистрироваться/авторизоваться" с помощью функции e.preventDefault() и отправляет AJAX-запросы. В зависимости от ответа сервера, выводит то или иное сообщение и определяет дальнейшие действия/
assets/js/script.js
$(function(){ var form = $("#login-register"); form.on("submit", function(e){ if(form.is(".loading, .loggedIn")){ return false; } var email = form.find("input").val(), messageHolder = form.find("span"); e.preventDefault(); $.post(this.action, {email: email}, function(m){ if(m.error){ form.addClass("error"); messageHolder.text(m.message); } else{ form.removeClass("error").addClass("loggedIn"); messageHolder.text(m.message); } }); }); $(document).ajaxStart(function(){ form.addClass("loading"); }); $(document).ajaxComplete(function(){ form.removeClass("loading"); }); });
был добавлен в форму для отображения текущего состояния AJAX-запроса (это стало возможным благодаря методам ajaxStart() ) и ajaxComplete() , которые вы сможете найти ближе к концу файла).Этот класс показывает крутящийся анимированный gif-файл (как бы намекающий нам на то, что запрос обрабатывается), и также выступает как флаг, предотвращающий повторную отправку формы (когда кнопка зарегистрироваться была уже однажды нажата). Класс .loggedIn - это другой флаг, - устанавливается тогда, когда был отправлен email. Этот флаг моментально блокирует любые дальнейшие действия с формой.
Схема базы данных
Наша невероятно простая система регистрации использует 2 MySQL таблицы (SQL-код находится в файле tables.sql ). Первая хранит данные об аккаунтах пользователей. Вторая хранит информацию о количестве попыток входа.

Схема таблицы пользователей.
Система не использует паролей, что видно на схеме. На ней же можно увидеть колонку token с токенами, соседствующую с колонкой token_validity . Токен устанавливается как только пользователь подключается к системе, задаёт свой email для отправки сообщения (чуть подробнее об этом в следующем блоке). Колонка token_validity устанавливает время на 10 минут позже, после которого токен перестаёт быть актуальным.

Схема таблицы, считающая количество попыток авторизации.
В обоих таблицах IP-адрес хранится в обработанном виде, с помощью функции ip2long в поле типа integer.
Теперь мы можем написать немножко PHP-кода. Основной функционал системы возложен на класс User.class.php , который вы можете видеть ниже.
Данный класс активно использует idorm (docs), эти библиотеки являются минимально необходимыми инструментами, для работы с базами данных. Он обрабатывает доступ к базе данных, генерацию токенов и их валидацию. Он представляет собой простой интерфейс, позволяющий легко подключить систему регистрации к вашему сайту, если он использует PHP.
User.class.php
Class User{ // Частный ORM случай private $orm; /** * Найти пользователя по токену. Только валидные токены, приняты к рассмотрению. Токен генерируется только на 10 минут с того момента как был создан * @param string $token. Это искомый токен * @return User. Вернуть значение функции User */ public static function findByToken($token){ // найти токен в базе и убедиться, что установлен корректный временной штамп $result = ORM::for_table("reg_users") ->where("token", $token) ->where_raw("token_validity > NOW()") ->find_one(); if(!$result){ return false; } return new User($result); } /** * Авторизовать или зарегистрировать пользователя * @param string $email. Пользовательский email-адрес * @return User */ public static function loginOrRegister($email){ // Если такой пользователь уже существует, вернуть значение функции User от заданного email-адреса хранимого в базе if(User::exists($email)){ return new User($email); } // В противном случае создать нового пользователя в базе и вернуть значение функции User::create от указанного email return User::create($email); } /** * Создать нового пользователя и сохранить в базу * @param string $email. Пользовательский email-адрес * @return User */ private static function create($email){ // Записать нового пользователя и вернуть результат функции User от этих значений $result = ORM::for_table("reg_users")->create(); $result->email = $email; $result->save(); return new User($result); } /** * Проверить, существует ли такой пользователь в базе и вернуть булево значение переменной * @param string $email. Пользовательский email-адрес * @return boolean */ public static function exists($email){ // Существует ли пользователь в базе? $result = ORM::for_table("reg_users") ->where("email", $email) ->count(); return $result == 1; } /** * Создать новый пользовательский объект * @param экземпляр $param ORM , id, email or 0 * @return User */ public function __construct($param = null){ if($param instanceof ORM){ // ORM проверка пройдена $this->orm = $param; } else if(is_string($param)){ // Проверка на email пройдена $this->orm = ORM::for_table("reg_users") ->where("email", $param) ->find_one(); } else{ $id = 0; if(is_numeric($param)){ // идентификатору пользователя передаётся значение переменной $param $id = $param; } else if(isset($_SESSION["loginid"])){ // В противном случае смотри сессию $id = $_SESSION["loginid"]; } $this->orm = ORM::for_table("reg_users") ->where("id", $id) ->find_one(); } } /** * Сгенерировать новый SHA1 токен авторизации, записывает в базу и возвращает его значение * @return string */ public function generateToken(){ // Сгенерировать токен для авторизованного пользователя и сохранить его в базу $token = sha1($this->email.time().rand(0, 1000000)); // Сохранить токен в базе // И пометить его, что он актуален только в течение 10 следующих минут $this->orm->set("token", $token); $this->orm->set_expr("token_validity", "ADDTIME(NOW(),"0:10")"); $this->orm->save(); return $token; } /** * Авторизовать пользователя * @return void */ public function login(){ // Отметить пользователя, как авторизованного $_SESSION["loginid"] = $this->orm->id; // Обновить значение поля базы last_login $this->orm->set_expr("last_login", "NOW()"); $this->orm->save(); } /** * Уничтожить сессию и разлогинить пользователя * @return void */ public function logout(){ $_SESSION = array(); unset($_SESSION); } /** * Проверка, заходил ли пользователь * @return boolean */ public function loggedIn(){ return isset($this->orm->id) && $_SESSION["loginid"] == $this->orm->id; } /** * Проверка является ли пользователь администратором * @return boolean */ public function isAdmin(){ return $this->rank() == "administrator"; } /** * Найти тип пользователя, может быть либо administrator либо regular * @return string */ public function rank(){ if($this->orm->rank == 1){ return "administrator"; } return "regular"; } /** * Метод позволяющий получить приватную информацию пользователя в *качестве свойств объекта User * @param string $key Имя свойства, получающего доступ * @return mixed */ public function __get($key){ if(isset($this->orm->$key)){ return $this->orm->$key; } return null; } }
Токены генерируются с помощью SHA1 алгоритма и сохраняются в базе данных. Я использую функции времени MySQL, дабы задать 10-минутное ограничение актуальности токена.
Когда токен проходит процедуру валидации, мы напрямую говорим обработчику, что мы рассматриваем только токены, у которых ещё не истёк срок годности, хранимый в столбце token_validity.
Обратите внимание, что я использую волшебный метод __get библиотеки docs в конце файла, чтобы перехватить доступ к свойствам объекта User.
Благодаря этому становится возможным получить доступ к информации, хранящейся в базе, благодаря свойствам $user->email, $user->token и др. В следующем фрагменте кода рассмотрим для примера, как использовать эти классы.

Защищённая страница
Ещё один файл, хранящий полезный и необходимый функционал - это файл functions.php . Здесь есть несколько так называемых хелперов - функций-помощников, которые позволяют создавать более чистый и читабельный код в других файлах.
functions.php
Function send_email($from, $to, $subject, $message){ // Хелпер, отправляющий email $headers = "MIME-Version: 1.0" . "\r\n"; $headers .= "Content-type: text/plain; charset=utf-8" . "\r\n"; $headers .= "From: ".$from . "\r\n"; return mail($to, $subject, $message, $headers); } function get_page_url(){ // Определить URL PHP-файла $url = "http".(empty($_SERVER["HTTPS"])?"":"s")."://".$_SERVER["SERVER_NAME"]; if(isset($_SERVER["REQUEST_URI"]) && $_SERVER["REQUEST_URI"] != ""){ $url.= $_SERVER["REQUEST_URI"]; } else{ $url.= $_SERVER["PATH_INFO"]; } return $url; } function rate_limit($ip, $limit_hour = 20, $limit_10_min = 10){ // Количество попыток входа за последний час по этому IP-адресу $count_hour = ORM::for_table("reg_login_attempt") ->where("ip", sprintf("%u", ip2long($ip))) ->where_raw("ts > SUBTIME(NOW(),"1:00")") ->count(); // Количество попыток входа за последние 10 минут по этому IP-адресу $count_10_min = ORM::for_table("reg_login_attempt") ->where("ip", sprintf("%u", ip2long($ip))) ->where_raw("ts > SUBTIME(NOW(),"0:10")") ->count(); if($count_hour > $limit_hour || $count_10_min > $limit_10_min){ throw new Exception("Too many login attempts!"); } } function rate_limit_tick($ip, $email){ // Создать новую запись в таблице, считающей количество попыток входа $login_attempt = ORM::for_table("reg_login_attempt")->create(); $login_attempt->email = $email; $login_attempt->ip = sprintf("%u", ip2long($ip)); $login_attempt->save(); } function redirect($url){ header("Location: $url"); exit; }
Функции rate_limit и rate_limit_tick следят за количеством попыток авторизации за истёкший период времени с момента первой попытки. Попытка входа записывается в базе в столбец reg_login_attempt. Эти функции вызываются когда происходит обработка и отправка данных формы как вы можете видеть из следующего фрагмента кода.
Код ниже взят из файла index.php и он обрабатывает отправку формы. Он возвращает JSON-ответ, который, в свою очередь, обрабатывается jQuery в файле assets/js/script.js , который мы уже разбирали ранее.
index.php
Try{ if(!empty($_POST) && isset($_SERVER["HTTP_X_REQUESTED_WITH"])){ // Output a JSON header header("Content-type: application/json"); // Является ли этот email-адрес валидным if(!isset($_POST["email"]) || !filter_var($_POST["email"], FILTER_VALIDATE_EMAIL)){ throw new Exception("Please enter a valid email."); } // Проверка. Позволено ли пользователю авторизоваться, не превысил ли он количество допустимых подключений? (файл functions.php для большей информации) rate_limit($_SERVER["REMOTE_ADDR"]); // Записать эту попытку авторизации rate_limit_tick($_SERVER["REMOTE_ADDR"], $_POST["email"]); // Отправить письмо пользователю $message = ""; $email = $_POST["email"]; $subject = "Your Login Link"; if(!User::exists($email)){ $subject = "Thank You For Registering!"; $message = "Thank you for registering at our site!\n\n"; } // Попытка авторизовать или зарегистрировать пользователя $user = User::loginOrRegister($_POST["email"]); $message.= "You can login from this URL:\n"; $message.= get_page_url()."?tkn=".$user->generateToken()."\n\n"; $message.= "The link is going expire automatically after 10 minutes."; $result = send_email($fromEmail, $_POST["email"], $subject, $message); if(!$result){ throw new Exception("There was an error sending your email. Please try again."); } die(json_encode(array("message" => "Thank you! We\"ve sent a link to your inbox. Check your spam folder as well."))); } } catch(Exception $e){ die(json_encode(array("error"=>1, "message" => $e->getMessage()))); }
После успешной авторизации/регистрации код выше отправит пользователю ссылку для авторизации. Токен становится доступным, т.к. он передаётся в качестве переменной в генерируемой ссылке методом $_GET с маркером tkn
index.php
If(isset($_GET["tkn"])){ // Является ли этот токен валидным для авторизации? $user = User::findByToken($_GET["tkn"]); if($user){ // Да, является. Осуществить редирект на защищённую страницу $user->login(); redirect("protected.php"); } // Нет, токен не валидный. Осуществить редирект, на страницу с формой авторизации/регистрации redirect("index.php"); }
$user->login()
создаст необходимые переменные для сессии, так что пользователь, просматривая последующие страницы сайта, будет всё время оставаться авторизованным.
Похожим образом устроена и обработка функции на выход из системы.
index.php
If(isset($_GET["logout"])){ $user = new User(); if($user->loggedIn()){ $user->logout(); } redirect("index.php"); }
В конце кода, я снова поставил редирект на index.php, таким образом параметр ?logout=1 передаваемый посредством URL не требуется.
Наш файл index.php требует доп. защиты - мы не хотим, чтобы люди, которые когда-либо однажды авторизовались в системе опять видели форму регистрации. Для этих целей, мы используем метод $user->loggedIn() .
index.php
$user = new User(); if($user->loggedIn()){ redirect("protected.php"); }
Наконец-то, вот кусок кода, позволяющий защитить страницы вашего сайта и сделать её доступной только после авторизации.
protected.php
// Чтобы защитить каждую страницу на вашем сайте подключите к ней файл // main.php и создайте новый объект User. Вот как это просто! require_once "includes/main.php"; $user = new User(); if(!$user->loggedIn()){ redirect("index.php"); }
После этой проверки можете быть уверенными, что пользователь был успешно авторизован. Вы также можете получить доступ к хранимой информации в базе с помощью свойств объекта $user . Для вывода email-а пользователя и его статуса используйте этот код:
Echo "Your email: ".$user->email; echo "Your rank: ".$user->rank();
Метод rank() используется здесь потому что в базе обычно хранятся номера (0 для обычного пользователя, 1 для администратора) и нам нужно преобразовать эти данные в статусы, к которым они относятся, в чём нам и помогает этот метод.
Чтобы сделать из обычного пользователя администратора, просто отредактируйте пользовательскую запись через phpMyAdmin (или любую другую программу, позволяющую управлять базами данных). Статус администратора не даёт каких-либо привилегий, в данном примере на странице будет выведено, что вы администратор - и всё.
А вот что с этим делать - остаётся уже на ваше усмотрение, вы можете сами написать и составить код, задающий определённые привилегии и возможности для администраторов.
Мы закончили!
С этой невероятно супер квази простой формой мы закончили! Вы можете использовать её в ваших PHP-сайтах, это достаточно просто. Также вы можете модифицировать её под себя и сделать её такой, как вы хотите.
Материал подготовил Денис Малышок специально для сайта сайт
P.S. Хотите двигаться дальше в освоении PHP и ООП? Обратите внимание на премиум-уроки по различным аспектам сайтостроения, включая программирование на PHP, а также на бесплатный курс по созданию своей CMS-системы на PHP с нуля с использованием ООП:
Понравился материал и хотите отблагодарить?
Просто поделитесь с друзьями и коллегами!
In this lesson, we learn how to create user account registration form with PHP validation rules, upload profile avatar image and insert user data in MySQL database. We will then retrieve the information from the database and display it on the user profile welcome page. Here is what the welcome page is going to look like:
Setting up Form CSS and HTMLFirst, go ahead and copy the HTML source from below codepen and place the code in a file called form.php. Also create another file named form.css in the same directory and copy and paste all of the CSS code from the codepen below into it:
Once you"ve saved form.php and form.css, you may go ahead and run form.php to see what the form looks like. It should look exactly the same as the one showing in the "Result" tab from the codepen above.
Creating the Database and TableBefore we start adding PHP code to our form, let"s go ahead and create the database with a table which will store our registered users information in it. Below in the SQL script to create the database "accounts" and table "users":
CREATE DATABASE accounts; CREATE TABLE `accounts`.`users` (`id` INT NOT NULL AUTO_INCREMENT, `username` VARCHAR(100) NOT NULL, `email` VARCHAR(100) NOT NULL, `password` VARCHAR(100) NOT NULL, `avatar` VARCHAR(100) NOT NULL, PRIMARY KEY (`id`));
Below is a complete code with error checking for connecting to MySQL database and running above SQL statements to create the database and users table:
//connection variables $host = "localhost"; $user = "root"; $password = "mypass123"; //create mysql connection $mysqli = new mysqli($host,$user,$password); if ($mysqli->connect_errno) { printf("Connection failed: %s\n", $mysqli->connect_error); die(); } //create the database if (!$mysqli->query("CREATE DATABASE accounts2")) { printf("Errormessage: %s\n", $mysqli->error); } //create users table with all the fields $mysqli->query(" CREATE TABLE `accounts2`.`users` (`id` INT NOT NULL AUTO_INCREMENT, `username` VARCHAR(100) NOT NULL, `email` VARCHAR(100) NOT NULL, `password` VARCHAR(100) NOT NULL, `avatar` VARCHAR(100) NOT NULL, PRIMARY KEY (`id`));") or die($mysqli->error);
With our HTML, CSS and the database table in place, we"re now reading to start working on our form. The first step is to create a place for error messages to show up and then we"ll start writing some form validation.
Starting New Session for Error MessagesOpen up the form.php and add the following lines to it at the very top, make sure to use the php opening and closing tags (I have not included the html part of form.php to keep things clean).
We have created new session because we"re going to need to access $_SESSION["message"] on the "welcome.php" page after user successfully registers. MySQL connection has also been created right away, so we can work with the database later on.
We also need to print out $_SESSION["message"] on the current page. From the beginning the message is set to "" (empty string) which is what we want, so nothing will be printed at this point. Let"s go ahead and add the message inside the proper DIV tag:
Creating Validation RulesThis form already comes with some validation rules, the keyword "required" inside the HTML input tags, is checking to make sure the field is not empty, so we don"t have to worry about empty fields. Also, by setting input type to "email and "password", HTML5 validates the form for proper email and password formatting, so we don"t need to create any rules for those fields either.
However, we still need to write some validation rules, to make sure the passwords are matching, the avatar file is in fact an image and make sure the user has been added to our database.
Let"s create another file and call it validate.php to keep things well organized. We"ll also include this file from our form.php.
The first thing we"re going to do inside validate.php is to make sure the form is being submitted.
/* validate.php */ //the form has been submitted with post method if ($_SERVER["REQUEST_METHOD"] == "POST") { }
Then we"ll check if the password and confirm password are equal to each other
if ($_SERVER["REQUEST_METHOD"] == "POST") { //check if two passwords are equal to each other if ($_POST["password"] == $_POST["confirmpassword"]) { } }
Working with Super Global VariablesNote how we used super global variables $_SERVER and $_POST to get the information we needed. The keys names inside the $_POST variable is available because we used method="post" to submit our form.
The key names are all the named HTML input fields with attribute name (eg: name="password", name="confirmpassword"):
/>
To clarify a bit more, here is what the $_POST would look like (assuming all the fields in the form have been filled out) if we used a print_r($_POST) function on it, followed by die(); to terminate the script right after printing it. This is a good way of debugging your script and seeing what"s going on:
if ($_SERVER["REQUEST_METHOD"] == "POST") { print_r($_POST); die(); /*output: Array ( => clevertechie => [email protected] => mypass123 => mypass123 => Register) */
Now we"re going to get the rest of our submitted values from $_POST and get them properly formatted so they can be inserted to our MySQL database table
//the form has been submitted with post if ($_SERVER["REQUEST_METHOD"] == "POST") { if ($_POST["password"] == $_POST["confirmpassword"]) { //define other variables with submitted values from $_POST $username = $mysqli->real_escape_string($_POST["username"]); $email = $mysqli->real_escape_string($_POST["email"]); //md5 hash password for security $password = md5($_POST["password"]); //path were our avatar image will be stored $avatar_path = $mysqli->real_escape_string("images/".$_FILES["avatar"]["name"]); } }
In the above code, we used real_escape_string() method to make sure our username, email and avatar_path are formatted properly to be inserted as a valid SQL string into the database. We also used md5() hash function to create a hash string out of password for security.
How File Uploading WorksAlso, notice the new super global variable $_FILES, which holds the information about our image, which is the avatar being uploaded from the user"s computer. The $_FILES variable is available because we used enctype="multipart/form-data" in our form:
Here is the output if we use the print_r($_FILES) followed by die(); just like we did for the $_POST variable:
if ($_SERVER["REQUEST_METHOD"] == "POST") { print_r($_FILES); die(); /*output: Array ( => Array ( => guldan.png => image/png => C:\Windows\Temp\php18D8.tmp => 0 => 98823)) */ //this is how we"re able to access the image name: $_FILES["avatar"]["name"]; //guldan.png
When the file is first uploaded, using the post method, it will be stored in a temporary directory. That directory can be accessed with $_FILES[ "avatar "][ "tmp_name" ] which is "C:\Windows\Temp\php18D8.tmp" from the output above.
We can then copy that file from the temporary directory, to the directory that we want which is $avatar_path. But before we copy the file, we should check if the file is in fact image, for that we"ll check another key called from our $_FILES variable.
//path were our avatar image will be stored $avatar_path = $mysqli->real_escape_string("images/".$_FILES["avatar"]["name"]); //make sure the file type is image if (preg_match("!image!",$_FILES["avatar"]["type"])) { //copy image to images/ folder if (copy($_FILES["avatar"]["tmp_name"], $avatar_path)) { } }
The preg_match function matches the image from the [ "type" ] key of $_FILES array, we then use copy() function to copy our image file which takes in two parameters. The first one is the source file path which is our ["tmp_name"] directory and the second one is the destination path which is our "images/guldan.png" file path.
Saving User Data in a MySQL DatabaseWe can now set some session variables which we"ll need on the next page, which are username and avatar_path, and we"ll also create the SQL query which will insert all the submitted data into MySQL database:
if (copy($_FILES["avatar"]["tmp_name"], $avatar_path)) { //set session variables to display on welcome page $_SESSION["username"] = $username; $_SESSION["avatar"] = $avatar_path; //create SQL query string for inserting data into the database $sql = "INSERT INTO users (username, email, password, avatar) " . "VALUES ("$username", "$email", "$password", "$avatar_path")"; }
The final step is turn our query, using the query() method and check if it"s successful. If it is, that means the user data has been saved in the "users" table successfully! We then set the final session variable $_SESSION[ "message" ] and redirect the user to the welcome.php page using the header() function:
//check if mysql query is successful if ($mysqli->query($sql) === true) { $_SESSION[ "message" ] = "Registration succesful! Added $username to the database!"; //redirect the user to welcome.php header("location: welcome.php"); }
That"s pretty much all we need for the validation, we just need to add all the "else" keywords in case things don"t go as planned from all the if statements we have created. Here is what the full code for validate.php looks so far:
/* validate.php */ //the form has been submitted with post if ($_SERVER["REQUEST_METHOD"] == "POST") { //two passwords are equal to each other if ($_POST["password"] == $_POST["confirmpassword"]) { //define other variables with submitted values from $_POST $username = $mysqli->real_escape_string($_POST["username"]); $email = $mysqli->real_escape_string($_POST["email"]); //md5 hash password for security $password = md5($_POST["password"]); //path were our avatar image will be stored $avatar_path = $mysqli->real_escape_string("images/".$_FILES["avatar"]["name"]); //make sure the file type is image if (preg_match("!image!",$_FILES["avatar"]["type"])) { //copy image to images/ folder if (copy($_FILES["avatar"]["tmp_name"], $avatar_path)){ //set session variables to display on welcome page $_SESSION["username"] = $username; $_SESSION["avatar"] = $avatar_path; //insert user data into database $sql = "INSERT INTO users (username, email, password, avatar) " . "VALUES ("$username", "$email", "$password", "$avatar_path")"; //check if mysql query is successful if ($mysqli->query($sql) === true){ $_SESSION["message"] = "Registration successful!" . "Added $username to the database!"; //redirect the user to welcome.php header("location: welcome.php"); } } } } }
Setting Session Error Messages When Things Go WrongLet"s go ahead and add all the else statements at once where we simply set the $_SESSION[ "message" ] error messages which will be printed out when any of our if statements fail. Add the following code right after the last if statement where we checked for successful mysqli query and within the last curly bracket like this:
If ($mysqli->query($sql) === true){ $_SESSION["message"] = "Registration succesful!" . "Added $username to the database!"; header("location: welcome.php"); } else { $_SESSION["message"] = "User could not be added to the database!"; } $mysqli->close(); } else { $_SESSION["message"] = "File upload failed!"; } } else { $_SESSION["message"] = "Please only upload GIF, JPG or PNG images!"; } } else { $_SESSION["message"] = "Two passwords do not match!"; } } //if ($_SERVER["REQUEST_METHOD"] == "POST")
The session message will then display the error message in the div tag where we put our $_SESSION["message"] if you recall:
Below is an example of what the error message is going to look like when two passwords don"t match. Feel free to play around with it to trigger other error messages:
 Creating User Profile Welcome Page
We"re now done with the validate.php. The final step is to create welcome.php page which will display the username, avatar image and some users that have already been registered previously along with their own user names and mini avatar thumbnails. Here is what the complete welcome.php should look like, I will explain parts of it that may be confusing:

